No one wants a leaky faucet. Aside from the annoying sounds dripping water makes in your sink, it can also give you unpleasant surprises in your utility bill. Many homeowners wonder whether it would be a good idea to caulk around the faucet handle to stop the leaks.
You shouldn’t caulk around faucet handles; instead, try replacing parts first to prevent leaks. It would also be better to use plumber’s putty over caulk as it is softer and more malleable. Caulk tends to harden over time which can cause issues.
This article will explain why caulking isn’t always necessary when you have leaks. I will also explain how to replace gaskets or ball valves in your faucet and why plumber’s putty may be better than caulking. Read on and get rid of those pesky drips now!
When To Caulk Around Faucet Handles
I’m a bit apprehensive about caulking for faucets, but I do push for it if you’re conscious about mold or mildew growth.
Leaking water can create an environment perfect for mold to grow, so you’ll want to take care of the issue as soon as possible.
Plus, leaking water can be highly damaging to your home.
You’ll want to know when to use caulk for your faucets and when to try something else to get the best results.
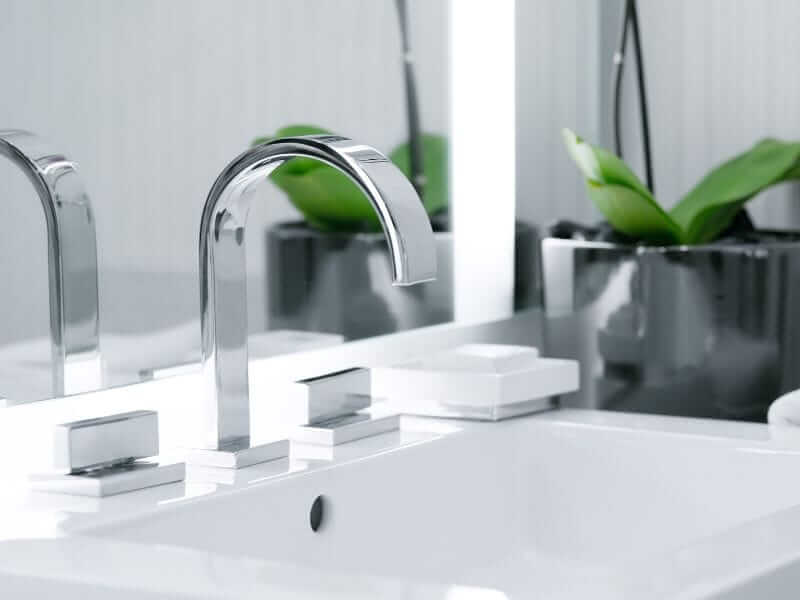
Caulking Is Good for the Bathroom
I would advise you to spread caulk around bathtubs, and bathroom sink handles.
These parts are always in contact with water, making leaks much more likely.
Generally, you don’t need to caulk around your bathroom faucets.
Your bathroom sink should already have a rubber gasket to seal in water, making caulking unnecessary.
As a preventative measure, you can add a small caulk line around the bathtub and sink.
Prioritizing Component Replacement
I’m a bit apprehensive about recommending caulking because caulk is a very rigid material once it sets.
You wouldn’t be able to undo it. Plus, you need to know what type of caulk you need.
Once it dries, it will become tough to undo the caulk job.
Piling more caulk on top of a botched caulk job might change the water’s flow which could be harmful.
The only exception to this will be if your faucet manufacturer recommends doing caulking during times of leaking.
But, most faucet leaks are usually prevented by rubber gaskets that you can easily replace.
So, while you don’t need to discount caulking altogether, consider component replacement as your first option. It’s much more effective.
Understanding Your Faucet Type
To replace gaskets and faulty components correctly, you must understand what type of faucet you have at home.
1. Traditional Faucets
Traditional faucets have five major parts – the pipeline, the screw, the jumper, and the gasket.
The first one is the pipeline, which receives the water from the water source.
The faucet handle, jumper, and rubber gasket allow water to flow from the pipeline and through the faucet.
The jumper and rubber washer are attached to the screw of the faucet handle.
When you turn on the faucet, the screw rises and lifts the attached jumper and gasket.
This allows water to pass through. The opposite happens when you turn the handle the opposite way.
2. Ball Assembly Faucets
A ball stands between the water and the faucet’s opening in a ball assembly faucet.
This ball has a hole the water can pass through when you turn the faucet handle a certain way.
Turning the faucet off simply allows the water to face the impassable part of the ball.
3. Single Lever Faucets
A single lever tap has a hollow ball with three holes as the main stopper component.
Single lever taps are often used to access hot and cold water.
Turning the faucet down forces the water to face the unpassable part of the hollow ball.
Turning the faucet to the left aligns the hot water hole with the hot water pipe.
Meanwhile, turning the faucet to the right aligns the pipe with the cold water.
If you turn it up in the middle, the hot and cold water pipe will flow in the ball, giving you regular-temperature water.
Replacing Faulty Components in Leaky Faucets
Now that you better understand the three common faucet types, you can better manage leaky faucets since you’ll know what component can be replaced for the dripping to stop.
1. Replacing the Washer in a Traditional Tap
- Turn off the water supply to avoid making a mess. The valve for the water supply is usually found under the sink.
- Turn on your faucet. Any remaining water in the system goes into the drain.
- Plug the drain. You don’t want debris to get in.
- Remove the faucet knob. Use an adjustable wrench or a screwdriver to remove the faucet knob, depending on the model.
- Remove the nut. A nut is usually under the knob to hold it in place. Take it out using a spanner wrench.
- Remove the washer. Beneath this nut is the screw where the gasket and washer are attached. Before doing this, it would help to have several washer sizes available.
- Fit in the right washer size. Make sure it is tightly in place, and re-screw the placing nut and faucet knob.
- Monitor the tap. Check to see if the problem persists.
2. Replacing the Ball in a Ball Faucet
- Turn off the water supply. You can find the valve under the sink.
- Turn on your faucet. All remaining water goes down the drain.
- Plug the drain.
- Remove the nut. Unscrew the headgear and take out the placing nut, much like traditional taps.
- Remove and replace the ball. Take out the faulty ball and place the replacement ball in. Once it has fitted in, re-screw the headgear.
- Monitor the tap. Check to see if the problem persists.
3. Replacing the Ball in a Single Lever Faucet
- Turn off the water supply.
- Turn on the faucet. Doing so removes water from the system.
- Remove the handle. In the middle of the handle, you will most likely find the handle cover, take it out and then unscrew the screw beneath it. You can use an Allen wrench to take it out.
- Remove the adjusting ring. Use a plier to remove the adjusting ring underneath the handle. The adjusting ring is usually beige in color.
- Loosen the ball. Place a cloth on top of the remaining parts of the handle and use your wrench to loosen the cap of the ball.
- Remove the ball valve. Pull out the top layers until you reach the ball. Take out the ball valve.
- Remove the rubber seats. Using an Allen wrench, take out the rubber seats. Ideally, you should also be able to hook the springs underneath the seats.
- Take out your replacement seats and springs. The seat should cover the larger part of the springs. You have to be careful with how this is oriented.
- Add the replacement parts. Insert the replacement set into the opening.
- Insert the ball back above the seats and springs. There are pins on the sides that should be able to guide you.
- Replace the cap. Place the ball’s top layers and then place the cap of the ball. Place pressure on the top of the ball layers as you re-screw the cap to prevent later rotation problems.
- Re-screw the adjusting ring. You want it to be tight.
- Re-attach the cover and the handle. Use your tool to tighten the screws.
- Monitor the tap. Check to see if the problem persists.
Consider Using Plumber’s Putty
If you’re having trouble making the several components of your faucet stick to one another when readjusting the faucet, consider using plumber’s putty.
Most versions in the market do not harden or crack and have additional features such as anti-fungus protection.
Additionally, a plumber’s putty doesn’t stick to some surfaces immediately.
So if you aren’t satisfied with how the plumber’s putty mound is shaped, you can simply scrape excesses off.
This makes it perfect for those who are still inexperienced with plumbing.
Since caulking is a bit hard to work with, you must be precise to ensure that you won’t have to re-do the caulking job a second time.
Conclusion
Caulking is not necessary when you have leaky faucets.
You can pinpoint the faulty component quickly if you correctly understand how your faucet works. Some slight tinkering can get your leak-free faucet back in no time.
Cheers, tools owners!